How to Make a Cardboard Dragon Puppet
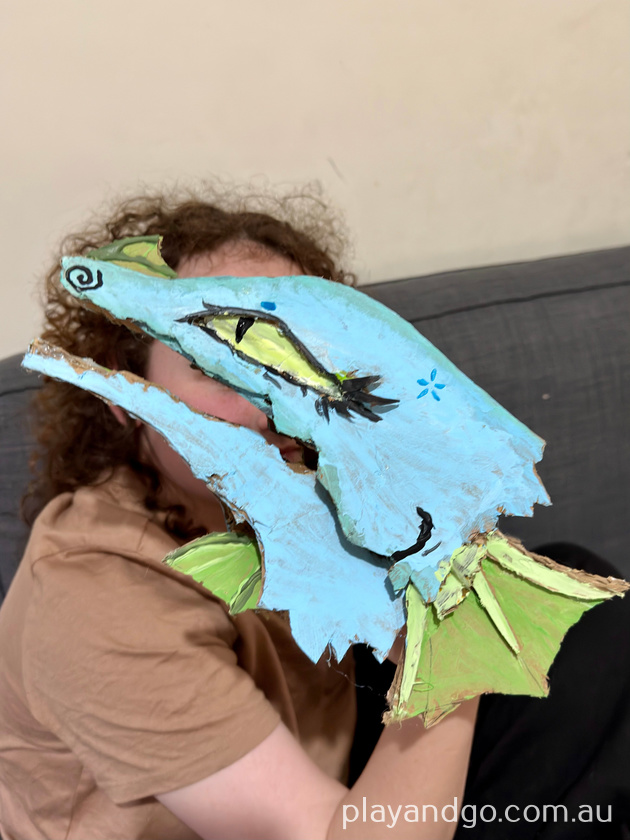
Fun Craft Activity for Kids – How to Make a Cardboard Dragon Puppet
Article by Claire Davill
This activity is a favourite for one of our junior reviewers, and it’s a great school holiday or rainy day idea for kids. It’s a great way to recycle cardboard, and you can really use your imagination, with lots of design and theme possibilities.
What you’ll need:
- Cardboard, about one medium cardboard box worth (we used a meal kit delivery box)
- A hot glue gun and glue sticks. Younger kids might need assistance with gluing.
- Scissors
- Acrylic or poster paint
- Paintbrushes
- Pencils or markers for sketching out your design
Optional extras:
- Air dry foam clay, for patching mistakes or creating a 3D effect on the cardboard (available at Kmart)
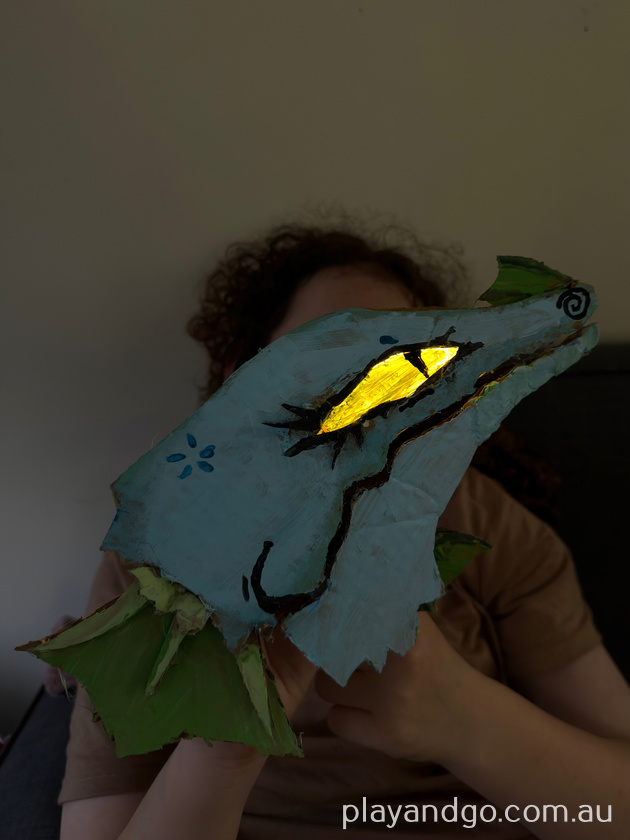
- Clear plastic or cellophane for the eyes.
- Wire string lights to light up the eyes or to decorate (available at Kmart)
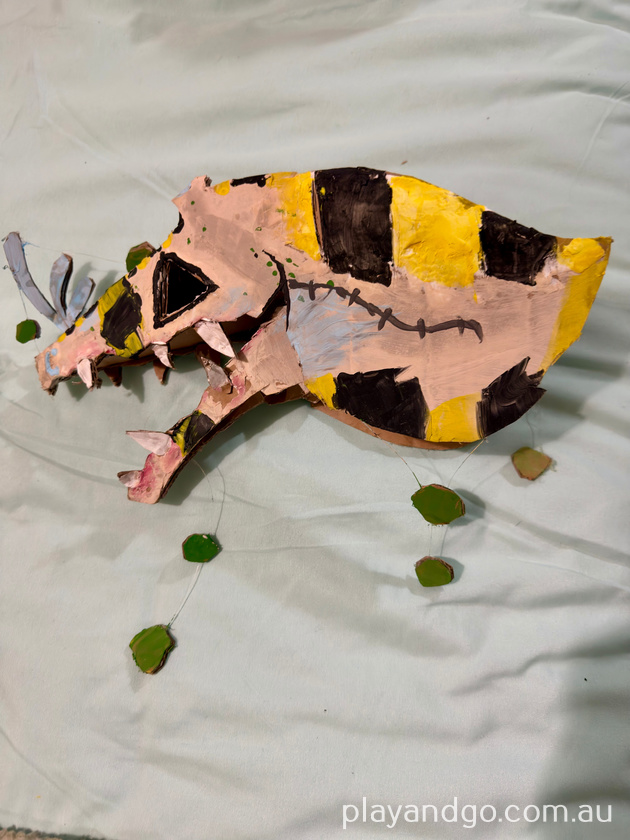
- Fake flowers or leaves for decoration
- Pipe cleaners, string, gem stickers, or whatever else you think would make good decorations.
Step 1: Sketch out your design and cut out the pieces.
Sketch your idea for a dragon head. Once you have your idea in place, draw one side of the face onto your cardboard. Add ears, fins or wings as separate shapes on your cardboard – you can always add more later if you want.
Cut out the head and then cut along the jaw line so you have an upper face and lower jaw. Cut out the eye holes. If you have lots of squiggly bits in your design, it might be easier to use a box cutter knife to cut the shapes out – this is an adults-only job!
Turn the head pieces over and trace around them so that you have the design for the opposite side of the dragon’s face, and then cut them out. Cut out two copies of any ears, fins, or spikes. If your design includes a horn, you’ll only need to cut out one of these.

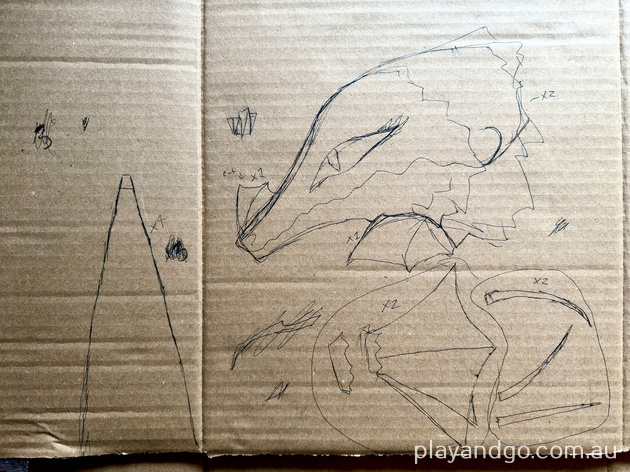
Step 2: Draw and cut out the puppet pieces.
You’ll need four triangles that form the puppet pieces where you operate the puppet with your hand. These triangles will need to be approximately the length of your dragon’s face/jawline, and wide enough at the base to fit your hand.
Draw one triangle, cut it out and then trace that triangle three more times so that all your triangles are the same size and shape.
Cut one thin strip of cardboard for the hinge of the jaw. This piece just needs to be big enough to stick the bases of two of your triangles together. If you like, you can cut an extra strip to create a loop to hold your fingers in the puppet for more control.
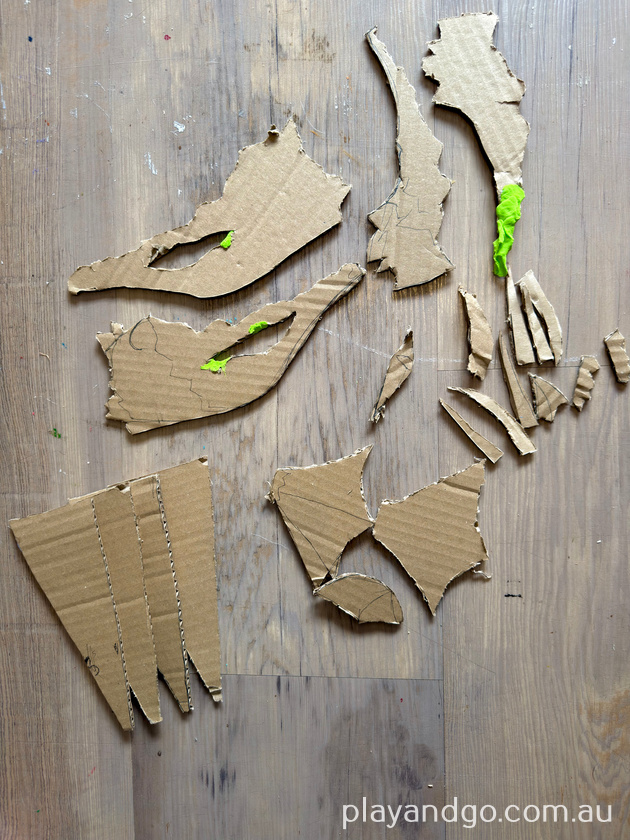
If you accidentally cut or tear part of your design, you can add some air dry clay to patch up any mistakes – this is particularly useful if your design has very narrow pieces. The colour of the air dry clay doesn’t matter (you can see we used green here), because you will be painting over it.
Step 3: Glue the triangles to the dragon head to create the puppet
You’ll need to glue two triangles to the upper face pieces, and two triangles to the lower jaw. For each piece, the tip of both triangles should meet at the nose/chin, and widen out to about 5cm apart at the back. The sides of the triangle should run along just inside the upper and lower edges of each piece.
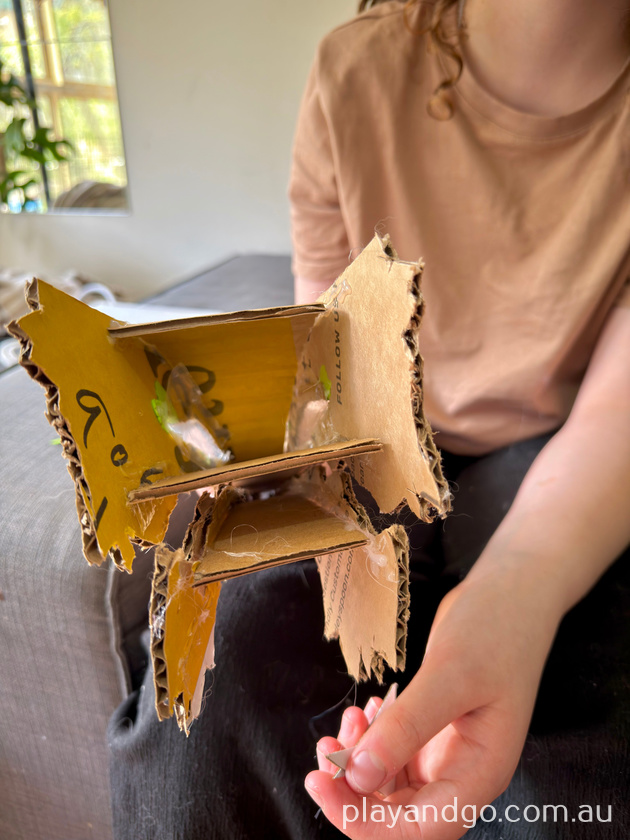
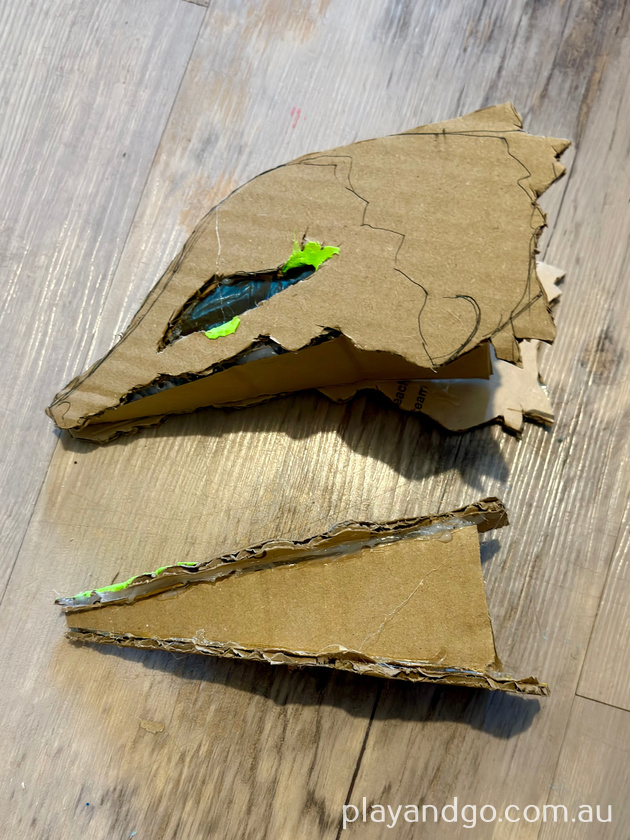
Don’t worry about getting glue in the wrong place, and if using a hot glue gun, watch your fingers and remember melted glue can hurt! For younger kids, this might be an adults-only job.
Step 4: Add jaw hinge and finger loop
Bend or fold the hinge strip in half, and then glue to the two inner triangle bases to form a hinge. If you are creating a finger loop, glue this in place a few centimetres in to the upper triangle space.
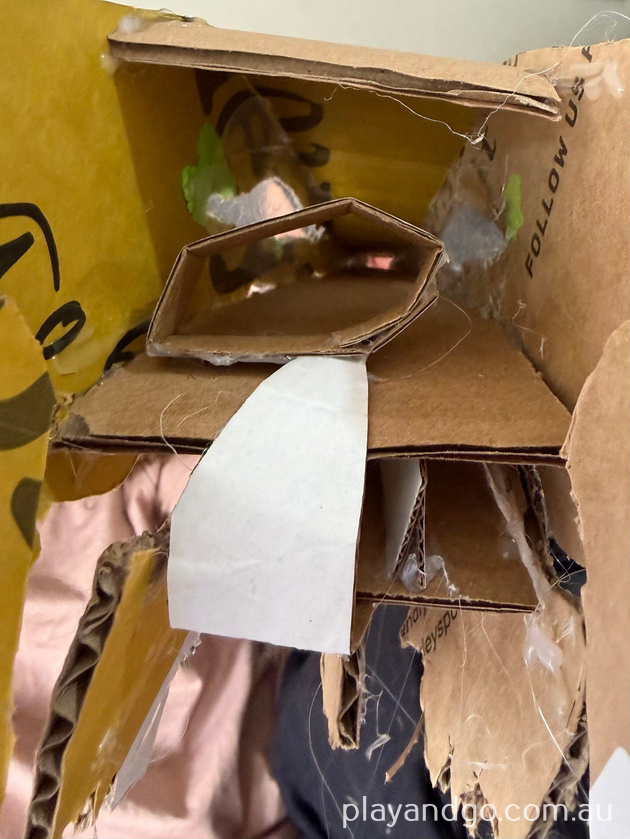
Step 5: Add extras and then paint
Glue on ears or fins, horns, and any other pieces you’ve decided to add. If you are feeling fancy, you can add some more foam air dry clay to create a 3D effect such as eyebrows, ridges, or spiky scales.
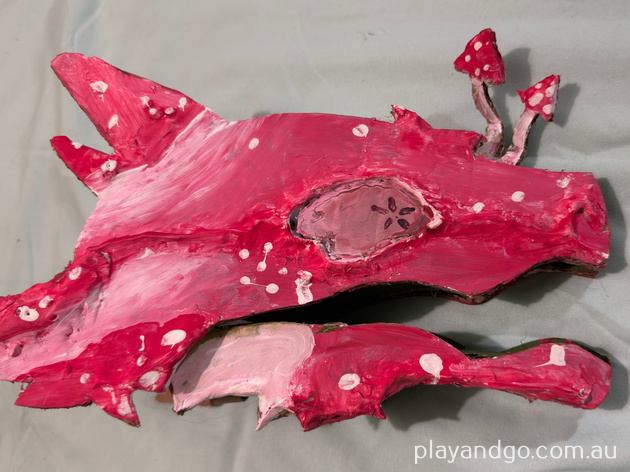
Paint with acrylic or poster paint, and add details and decorations. You don’t need to paint the insides of the puppet, or the underside of the jaw or top of the head if you don’t feel like it. If you have LED lights to add, glue these in last.
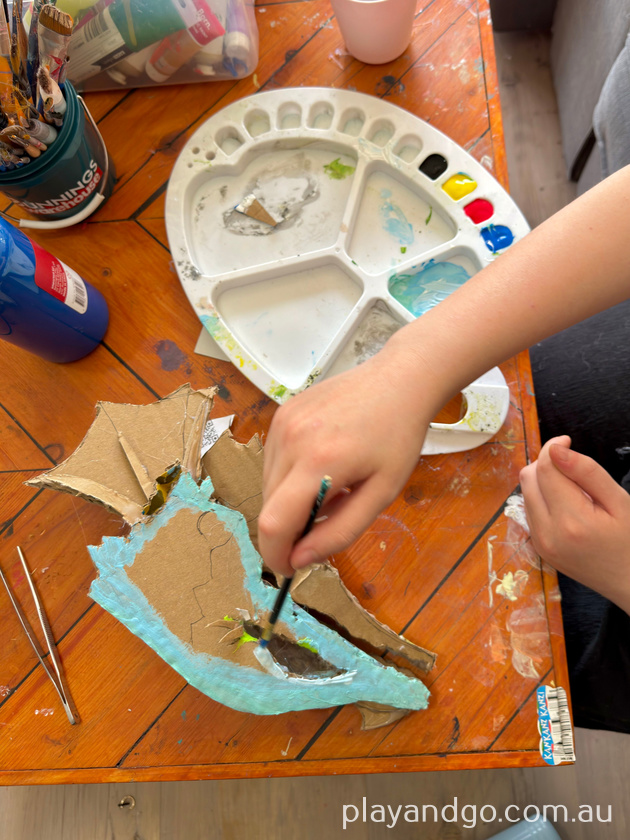
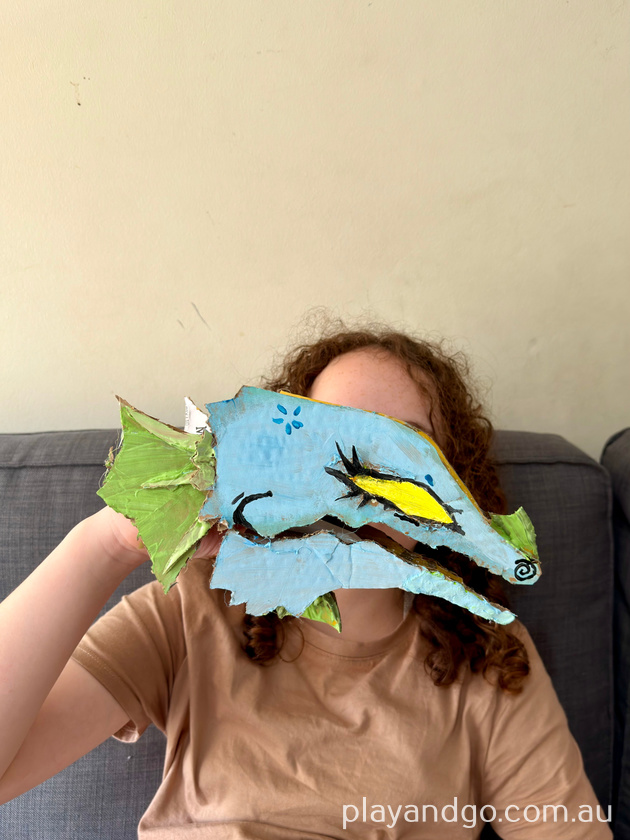
Step 6: Try out your puppet!
Put your fingers into the top cavity and your thumb into the bottom cavity. If your fingers or thumb are slipping, add extra loops inside the cavities. You can always add more bits and pieces, or start afresh and design an entirely new puppet.
What we like about making dragon puppets:
- It’s a cheap craft activity, using simple materials
- It’s a way to recycle cardboard and other materials – see what you can use.
- It’s a chance to get creative, and work together as a family (especially if kids need help cutting or gluing)
- It’s a great way to develop fine motor skills and problem solving skills.
Things to consider:
- Hot glue guns need close supervision for younger kids, and might not be appropriate to use for everyone.
- Some cardboard can be difficult to cut with scissors. Choose cardboard that is thinner, and avoid cardboard with glossy coverings if you think you’ll have trouble.
- Don’t get discouraged if your first puppet doesn’t turn out the way you want it too. These puppets take a bit of trial and error to determine what works, what size the pieces should be, and what designs work.
DISCOVER MORE STAY AT HOME ACTIVITIES






At Play & Go Adelaide we make every effort to provide accurate information to the best of our knowledge at the time of publication. We recommend confirming times, dates and details directly before making any plans as details may be subject to change.
As per all our Play & Go reviews, this is not a sponsored post and our review is done completely independently. All photos are by Play & Go (2026).
SUBSCRIBE
Follow Play & Go Adelaide on Facebook and Instagram
Want to get all the latest events and activities straight to your inbox?
Subscribe to our weekly email newsletter below to keep up to date with our latest posts and find out all the best events & activities for Adelaide families. Newsletters are only sent once a week, and you may sometimes get a special offer exclusively for our subscribers only!