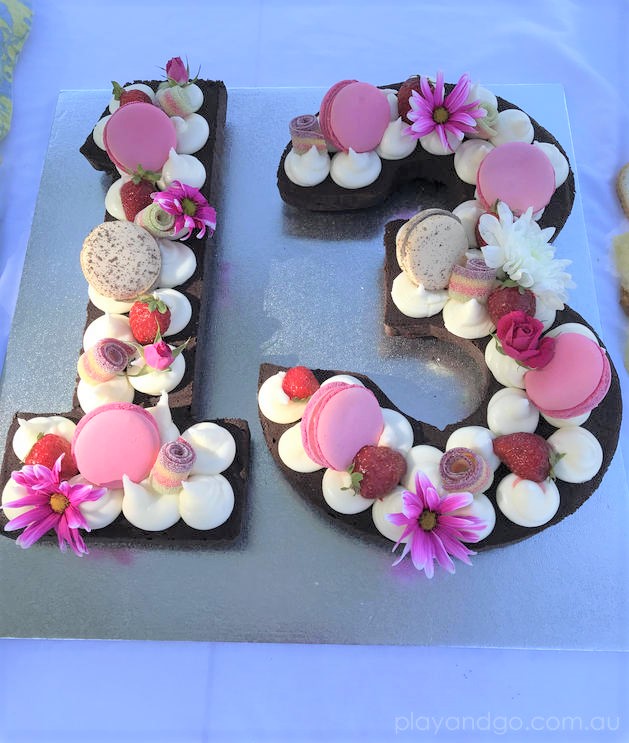
Flower Brownie Birthday Cake
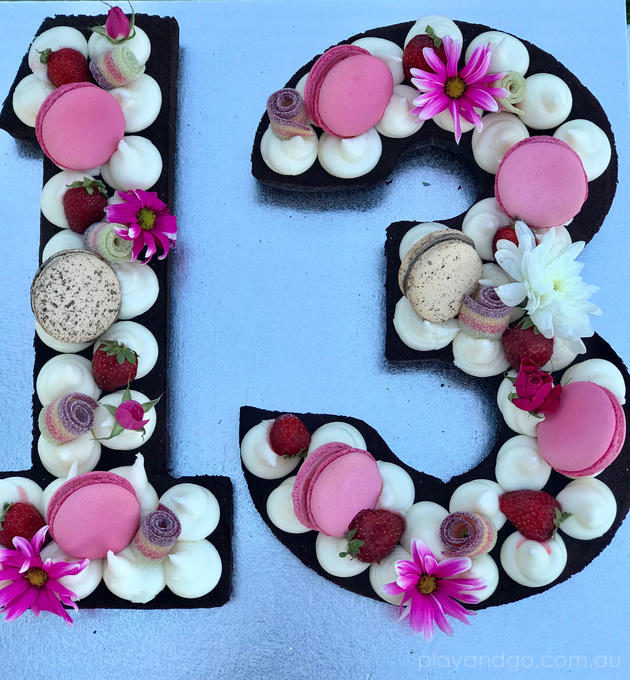
For Miss 13’s Birthday cake, I needed something simple and fast to make, consisting of things she likes to eat, with lots of pretty. The Flower Brownie Cake perfectly complemented her flower crown party.
Earlier in the year I came across this gorgeous ‘giant cookie’ birthday cake (pictured below) on Instagram, by Adi Klinghofer. They are all the rage right now in the cake world. It’s such a great idea using biscuits as layers, instead of an actual cake. This idea suited my Miss 13 as she is not really a huge fan of cake. However, I’ve never made a giant biscuit like this before and I was too scared it would break; didn’t have time to practise it and couldn’t find easy step by step instructions to follow at the time. So, I substituted the biscuit layers for brownie, which is one of Miss 13’s favourite food, and is simple, quick to make, and we’ve made it many times with a fool proof recipe. No stress.
The first thing you need are number cake tins. We hired our tins and purchased our silver cake board from That Cake Lady.
For the brownie we used Donna Hay’s Molten Choc Chunk Brownie recipe – it’s our favourite. Please note that for this cake we omitted the chopped dark chocolate pieces in the recipe which usually gives you gooey chocolate bits when you eat the brownie warm. As the brownie was going to be used cold, those chocolate bits harden and we prefer to not have them.
- Prepare your cake tins. Grease the tins with oil or butter, and cut baking paper to line them. Trace the cake tins onto the baking paper, then cut a little bit smaller so it will fit inside the tin. Cut long strips of baking paper to line the sides of the tins. Tip: in hindsight I would have put some strips of baking paper which would let you lift up the brownie from the tin easily – just a couple of long strips put underneath the other strips, which overhang at the top of the tin, such that you can hold and lift up.
2. Make your brownies, bake and let them cool, then turn out onto your cake board. Tip: use a little bit of buttercream icing as ‘glue’ in a couple of spots to keep the brownie from sliding around on the cake board.
3. Make buttercream icing. Using an electric mixer (we use a handheld one), beat about 125gm of butter until pale in colour. Gradually add icing sugar and 2 tablespoons of milk until you get a fairly thick consistency. You don’t want it too fluffy and soft so it won’t hold it’s shape when you pipe dollops so keep adding icing sugar to get it thick enough (but not too thick that you can’t pipe it). We used nearly a whole 1kg bag of icing sugar. Use a little bit of water or milk if you need to add more moisture.
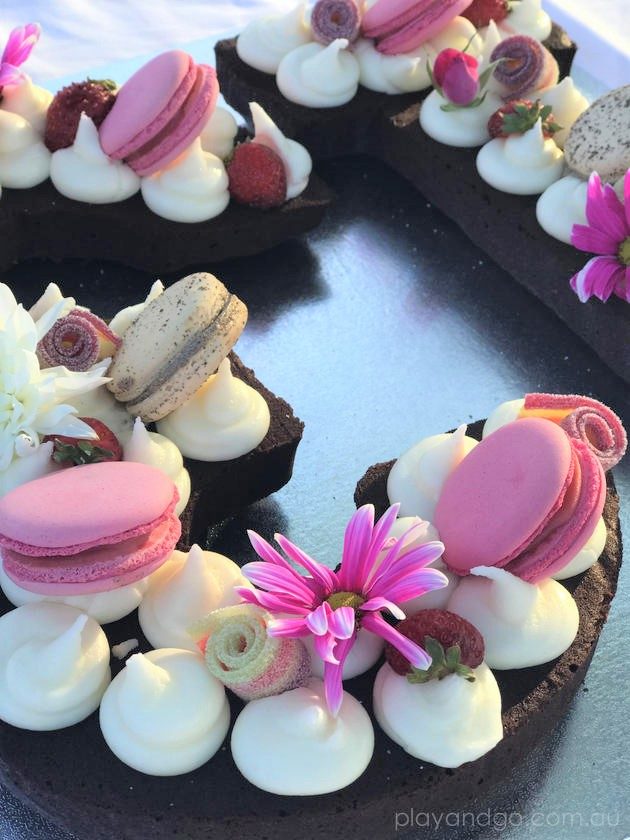
4. Pipe the buttercream icing. Use a large plain nozzle to pipe the dollops on the top of the brownie. These dollops serve two purposes. They are decorative and top off the brownie. They are also there to help you stick the other elements onto the cake.
5. Decorate. This is the fun bit! Carefully place your toppings on the cake, resting them onto your icing dollops. We used these items but you can use whatever you like:
- Macarons – 2 types – raspberry and cookies & cream (store bought from Viva Gourmet Fine Foods and The Black Fork, both at Burnside Village)
- “Unicorn Bacon” – these sour fruit strips were from the supermarket (we found these ones at Coles).
- Strawberries cut in half
- Fresh flowers
And that’s it! You’re done.
Probably the one thing that takes the longest is making that buttercream icing. The actual decorating is pretty quick to do.
We had planned to put 13 candles on the cake but unfortunately it was a little breezy outside so we just had 2 candles.
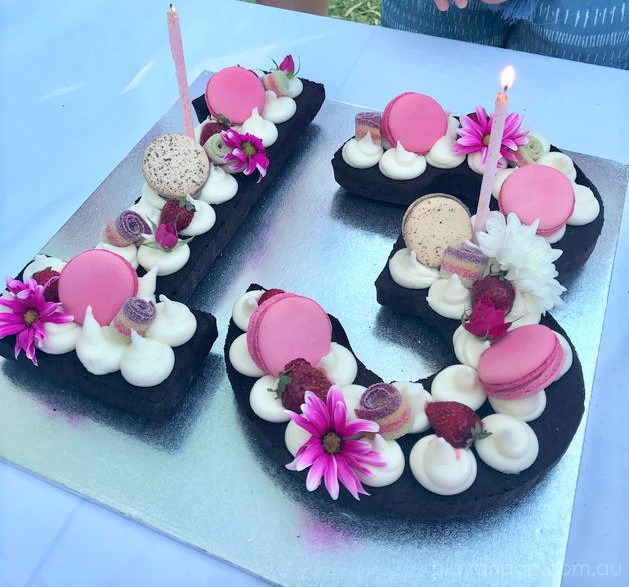
Our brownie did not sit completely flat on the board. If you wanted to, you could carefully slice the brownie so it’s flat. Unfortunately these tins were not back to front such that you could place the numbers with the bottoms flat.
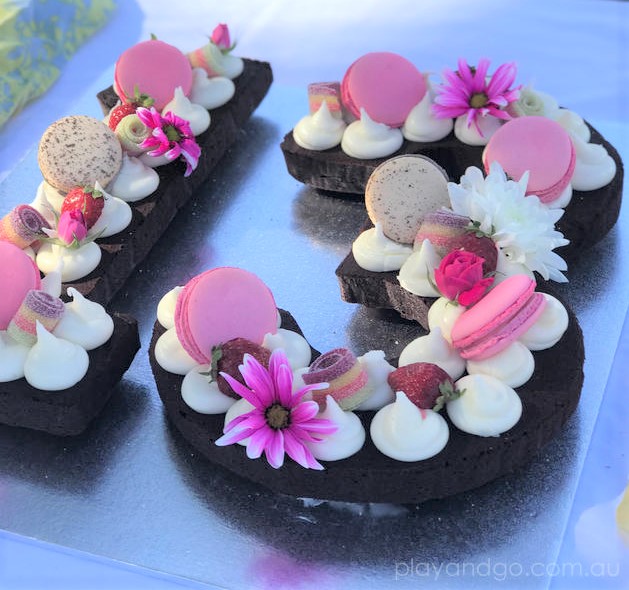
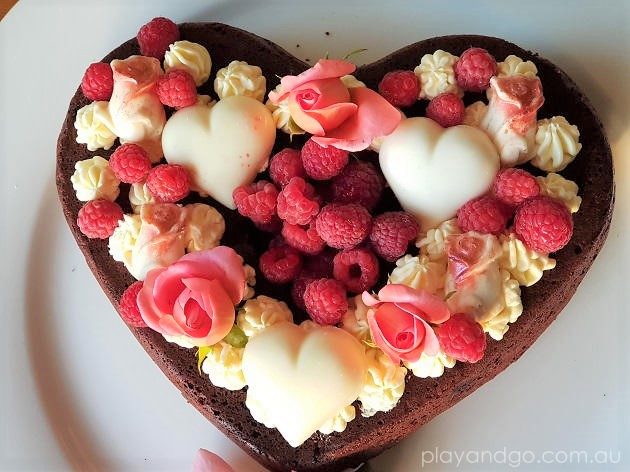
One of our Play & Go team Mel, also used the same idea for her daughter’s birthday cake below.
If you would like some ideas on how to make a cookie cake, this blog post by Jenny Cookies has some great options. She has some amazing variations that would suit kids’ cakes and shares her recipe for the biscuit at the bottom of her blog post. Here’s just one example from her Instagram:
See our Best Party Guide for other Birthday Party ideas:
At Play & Go Adelaide we make every effort to provide accurate information to the best of our knowledge at the time of publication. We recommend confirming times, dates and details directly before making any plans as details may be subject to change.
Image Source: All photos by Play & Go
SUBSCRIBE
Want to get all the latest events and activities straight to your inbox?
Subscribe to our weekly email newsletter below to keep up to date with our latest posts and find out all the best events & activities for Adelaide families. Newsletters are only sent once a week, and you may sometimes get a special offer exclusively for our subscribers only!