Chocolate House Birthday Cake – Like a Gingerbread House, only chocolatey | Party Recipe

This Chocolate House is a great alternative to a traditional cake – there’s no baking involved, it’s fairly quick to make (about 1.5 hours), and you can be pretty sure all the kids will love it. Just make sure you have plenty of people to share this one – there’s a LOT of chocolate involved. I have to warn you now.
Ingredients
9 Blocks of Chocolate 200gm (that’s not a typo – it is 9 blocks)!! You can use a variety of different flavours. We used Cadbury chocolate:
- 1 x Fruit & Nut and 1 x Oreo Peppermint on the bottom
- 4 x Milk chocolate – one for each side
- 2 x Snack chocolate for the roof panels – please note that Snack chocolate has different sized pieces (rectangular instead of square) compared to the other chocolate blocks and won’t fit if used on any of the other panels. Since the roof is covered with Licorice Allsorts, you can use any flavour/shapes there.
- 1 x Cadbury Top Deck (or other white chocolate) – cut 2 rectangular pieces as per photo above – 2 rows of 3 for the door and the back window; 2 pieces of 2 x 2 rows for the square windows.
4 sticks of Kit Kat
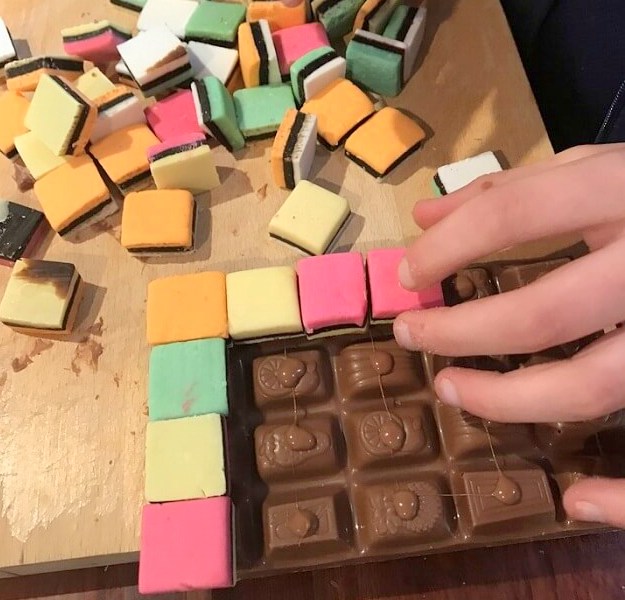
24 Licorice Allsorts cut in halves
Raspberries or similar lollies for decorating
Assorted lollies for inside the house
Disposable piping bag (we use the Multix brand you can buy at supermarkets – 5 in a box)
Non-stick baking paper
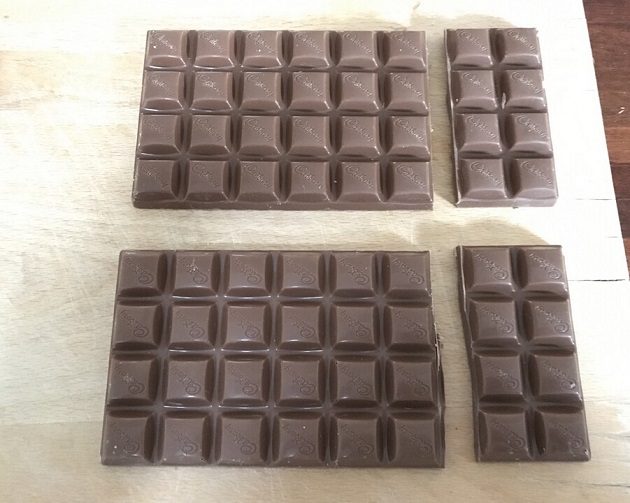
- Cut two blocks for the front and back of the house. Using a large sharp knife, cut off 2 rows of four (as above). Smooth the cut edges so they are straight by rubbing with a smaller knife (just a table or paring knife will do).
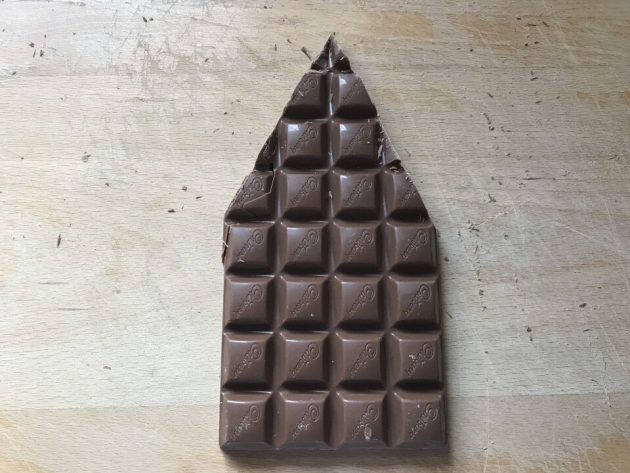
2. Cut two blocks for the sides of the house as per picture below. Tip: slice the sharp knife down from the roof tip down to the side – if you go the other way the tip of the roof may snap off easier. However, don’t worry if the tip at the roof top does break off when cutting, you can always ‘glue’ it back on with melted chocolate or if like us you accidentally throw that bit in to melt, it really doesn’t matter. You can hide anything with lollies later.
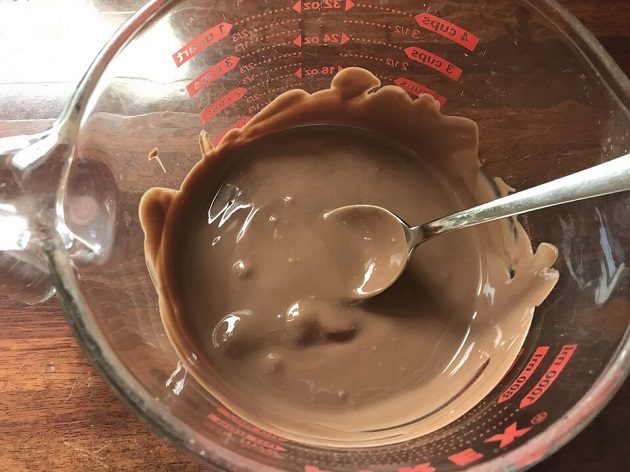
3. Put all the chocolate offcuts you have cut off into a microwavable jug and melt them – only do short zaps in the microwave about 20-30 seconds at a time. Don’t overdo or the chocolate may seize. You can also melt on the stove, putting a bowl over a saucepan of water. Once you have the melted chocolate you can use it like a glue and start sticking all the parts of the house together.
4. Put the melted chocolate into a disposable piping bag and cut the tip very small so the chocolate doesn’t run out too fast.
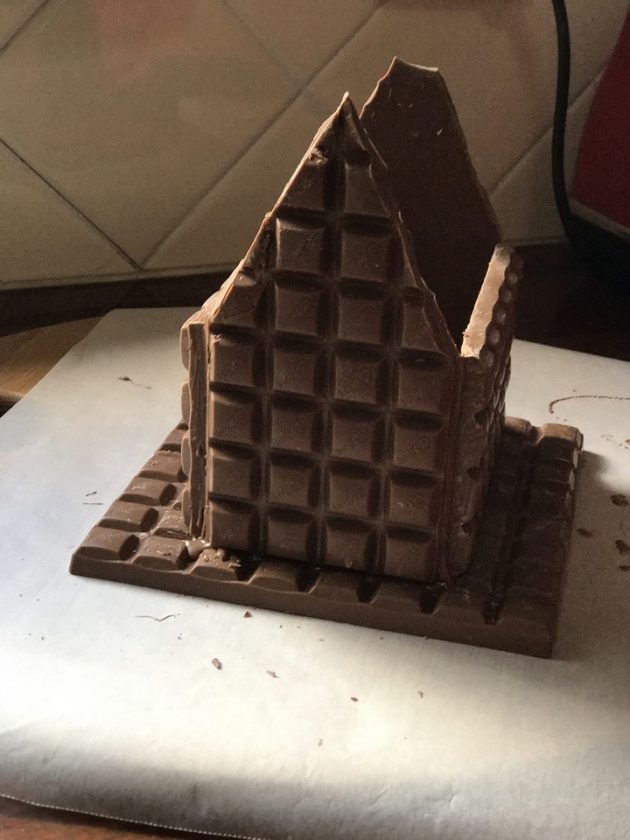
5. Using non-stick baking paper underneath, make the base by sticking together two whole blocks of chocolate – add melted chocolate along the two long sides and push together.
6. Leaving two rows from the front and one row on each side, glue the front of the house to the base. You will need an extra pair of hands ideally to hold that piece while you glue the side of the house to the front. Pipe the chocolate on the edges you need to stick together. We reinforced all the sides by running chocolate on the joins on the inside corners of the house. We were pleasantly surprised at how well all the pieces stuck together so easily.
Work fast as the melted chocolate will harden in the bag. We needed to zap it in the microwave for 10 seconds to melt it again after a while. We just popped it inside a mug with both ends sticking up.
See our videos for a guide.
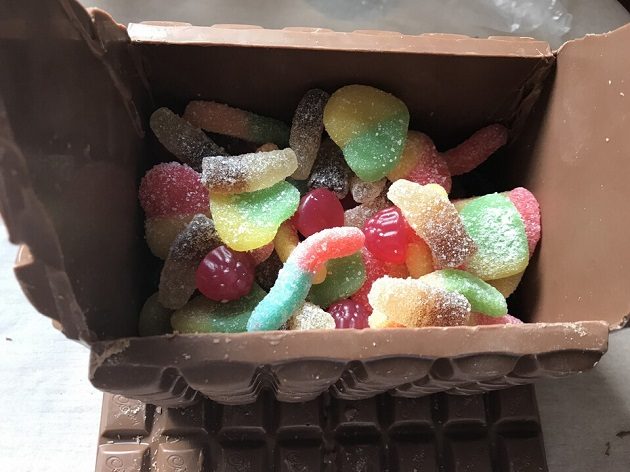
7. Once you have all your sides done, don’t forget to fill the inside of the house with lollies. We used assorted mixed lollies – the kids chose what they and their friends would like.
8. For the roof panels, we used Snack chocolate – the pieces are a different size so we only cut off one row. If you are using one of the other blocks with the same size pieces as the rest of the house, you will need to cut off 2 rows (like you did for the front and back of the house).
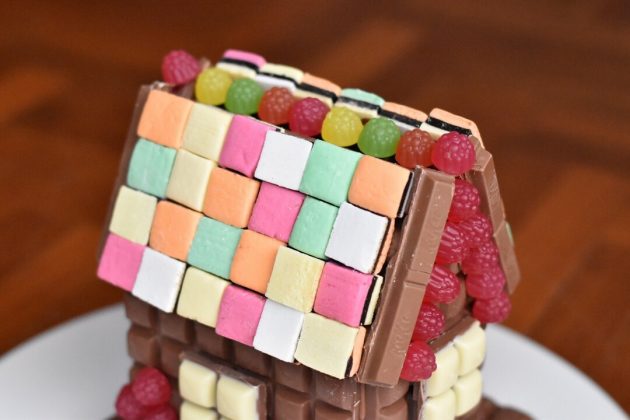
9. Slice all the Licorice Allsorts in half. Stick them on your roof panels with chocolate – we moved them around a bit so we didn’t have the same colours right next to each other.
10. Stick the roof panels onto the walls. We had a little gap at the top which we covered with lollies after.
11. Stick a piece of Kit Kat along each roof side to hide the gap there. Cutting the Kit Kat into individual pieces was the hardest part of this whole process – we broke a few and had to glue a bit together (and had to eat the broken pieces that we couldn’t use – poor us)!
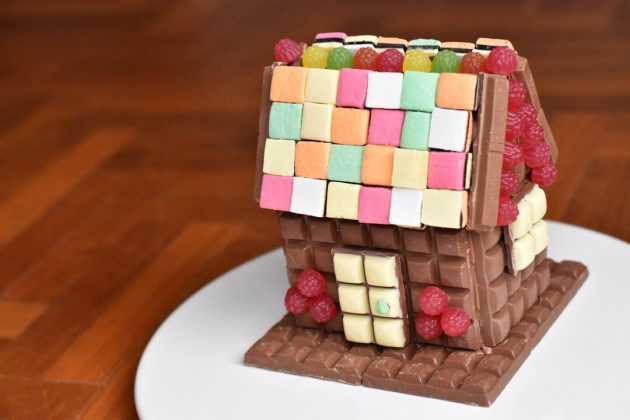
12. Stick the door and the windows on. We used a little piece of Licorice rolled up to be a door handle but you could also use a little lolly here.
13. Decorate the cake with raspberries or any other lolly you might like. The ones along the top of the roof we didn’t need to stick on, they sat there quite firmly.

You could make a little house number to add to the cake if you like for the age of the Birthday child.
We bought all our lollies from the lolly bins at Foodland. This is a fun thing to do for the kids to help choose the lollies for the inside of the cake and for decorating. It would be cheaper than buying bags of lollies when you don’t need that many of each.

Brush away all the little bits of chocolate that may have landed around the base. We used a soft brush but some bits are easier to remove by softly blowing them away.
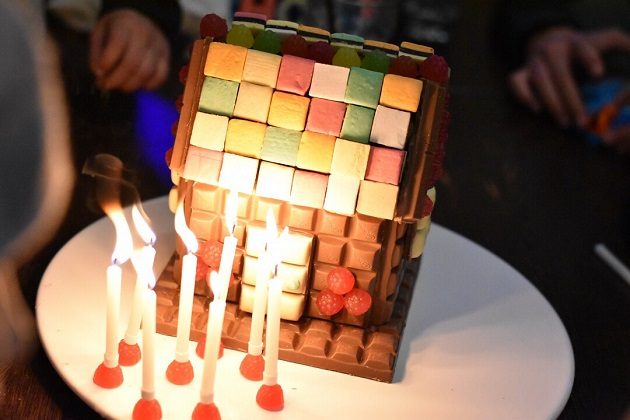
Move it onto the serving plate, and carefully slide the baking paper from under the cake. We used raspberries as candle holders – just stick the spiky candle holders firmly into the raspberry, and stick them onto the plate with some chocolate to keep them from falling.
See our Best Party Guide here for more Party Ideas
All photos & videos by Play & Go Adelaide. Thank you to Miss Sadie & Miss Amelie for their extra pairs of hands in making the cake and the video.
We were inspired by this Facebook video by Foodies of SA (South Africa) but have adapted it to suit chocolate available in Australia.
Want to get all the latest events and activities straight to your inbox?
Subscribe to our weekly email newsletter below to keep up to date with our latest posts and find out all the best events & activities for Adelaide families. Newsletters are only sent once a week, and you may sometimes get a special offer exclusively for our subscribers only!